
Day Hikes in Mt. Rainier NP
Find day hikes via a map
MPG V2.8, January 2013
The purpose of the day hike description and map Web pages are to provide the basic information and resources on day hikes in Mt. Rainier NP. Additional similar Web pages are available for backcountry hikes with the corresponding map of hikes Web pages.
Introduction
Many, and some will say most, of the photos taken of Mt. Rainier and Mt. Rainier NP are taken from locations along the roads and highway in the NP. This was intentional by the early planners of the NP to make it a visibly scenic national park by automobile. The first roads in the NP were engineered and built with this in mind, something many photographers over the one hundred and ten year history of the NP learned and used.
But for all those photos, there a many more locations and opportunities for photos available on the day hikes, which are easily accessible from visitors areas (parking with a short hike) or from trailheads alongside the highways through the NP. All it takes is a little experience, some preparation, and some basic hiking equipment.
Information
There is a wealth of information on day hikes in Mt. Rainier NP from books, listed below, outdoor recreation organizations and personal Websites and blogs, which any search engine will find. The National Park Service at Mt. Rainier NP has a short list of easily accessible day hikes, (overview), a longer list of day and other hikes, along with the latest trail conditions.
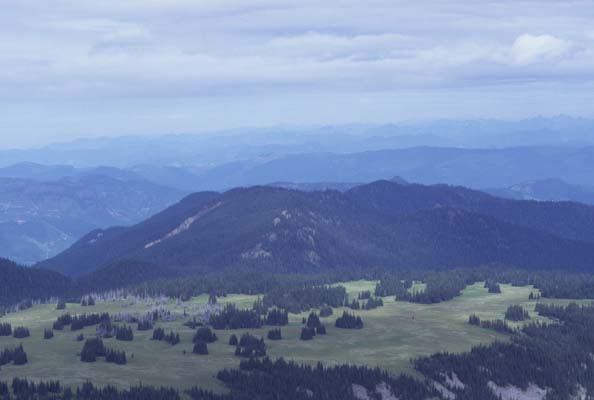
Any of these day hikes provide many photography opportunities of the variety of scenes in the NP, as I note in my photography guide and photo tips along some of my personal tips. And many provide views of Nt. Rainier and other mountains and mountain ranges in the Cascade Mountains (photo of Grand Park, above, from Freemont Lookout).
Conditions
When hiking in Mt. Rainier NP it is important to remember trail and hiking conditions can change from environmental and weather conditions. Despite the latest information on the trail conditions and weather, you should always be prepared for worsening conditions and weather, and be flexible with your plans
That said it pays to have the latest information on the conditions and facilities (roads, visitors centers, trails, etc.) before you go, and ask at the information centers when you're there. You can get some of this information from the NPS Website and from news and information Web page with the map.
In addition, you should consider the notes about the conditions in the NP, which are listed below for the different areas of the NP.
Carbon River Road.-- Due to the damage from the annual winter storms and floods from 2006 through 2008 the Carbon River road is closed at the NP boundary. The trailhead starts there and continues along the route of the old road to the Ipsut Campground, 5.0 miles from the entrance. This distance is included in the trail information on the map, but not in older hiking guides, published before 2008.
Mowich Lake Road.-- This road closes every October-November and reopens late June to early July, after the NPS has checked the road for damage from winter storms or snows or from landslides. It's open during the winter to the campground to hikers. A backcountry permit is required for overnight stays.
Stevens Canyon Road.-- This road closes every October-November and reopens late May or June depending on the snowpack, snowmelt and damage from snow storms and landslides. In some years the road has restricted access or traffic or is closed for repairs for periods during the summer.
Shuttle Service.-- The NPS runs shuttle service on weekends from Ashford to Longmire and on to Paradise from mid-June to early Sept. This reduces the parking at Paradise when the parking lot is full, usually by late morning to early afternoon. The service is free with frequent trips and stops, see information and schedule.
Bridges on trails.-- Some trails cross creeks or rivers. These bridges are usually rebuilt after the winter-spring snowmelt runoff. If a bridge is not there, use caution trying to cross the river, and unless you have experience wading glacial-fed rivers, consider the old adage about discretion being better than valor. Also, during snowmelt season, the diurnal flow usually peaks in the afternoon and evening, so conditions between morning and later in the day can be significantly different.
Photography
For doing photography on day hikes, the basic information is to remember to pack for both your hike and your photography, and most importantly, don't overburden yourself with too heavy or too big of a pack and find yourself miles from the trailhead tired and sore. And don't skimp on the basic safety and emergency equipment, like a first aid kit, food and clothing.
As for photography equipment, it's best to determine the type and subject of your photography, eg. scenic, landscape, nature, macro, etc., and optimize your equipment, or if possible in your schedule, plan additional hikes. It's the idea of not carrying equipment all day to find it wasn't used and was essentially dead weight all day.
The last idea is pack the photo equipment in the pack that's provide the best way to carry the weight and still provide the access to your photogaphy equipment. There are photo backpacks which do this, but my experience is that most of these lack the space or arrangement for normal hiking stuff, like water, foods, clothes, etc. And most normal backpacks aren't well suited for photography equipment.
This is another of the compromises necessary for both hiking and photography. I'm an advocate for not skrimping on hiking and emergency gear, if only following the minimalist approach with the least gear inclusive of the essential and emergency gear. This is because it's often easy to misjudge the distance and time back from the destination to find you're either hiking near or after sunset or looking for a place to camp, the latter is only permissible without a permit for designating campsites.
With respect to photography gear, you can read my suggestions based on my experience in the NP for 35mm equipment, which is usually two (digital and film) cameras and 3-4 lenses with a Gitzo 1275 tripod and Linhof Pro-II ballhead; the tripod and head for their extreme lightness, durability and ease of use. For large format, it's one camera, two lenses and the requisite film holders, filters, etc. with one 35mm camera and lens and the same tripod/head.
Photo Ops
The list of photo locations and opportunities in the NP are endless. The key is focusing on the trails for your photography. That said, it's sometimes hard to determine which trails and locations which will provide those opportunities. You can get clues from the trail information and the trail itself, namely the geography and environment of the trail, which is available from the many trail books and a map of the NP.
The geogaphy of the trail is the location and route of the trail from the trailhead, most of which start in the lowland forest, some which start near the edge of the forest and progress to the open meadow, alpine and glacial environments, and some which start in the alpine environments in the NP.
Almost all of the forest trails offer at least partial views of Mt. Rainier, but many of these start and traverse through the forest for miles only to find partial or more views of the mountain at river crossing or occasional viewpoints. These often will connect to other trails which continue to higher elevations and the open areas of the NP.
The trails which start at the edge of the forest and especially those starting at the edge of the open environments will provide extensive and unobstructive views of the mountain along with expansive views of the alpine meadows and areas and the glacial environments around the mountain.
In general the quadrant of the NP of the trailhead will provide the information for the type of trails described above, meaning in forest, edge of forest or open alpine and glacial environments. These are generalized by area below.
Northwest (Carbon River) area.-- Most of the trails in this area start in the forest and go for some distance (3-5+ miles) before getting to treeline or viewpoints. Some of the trails off the south side of the Carbon River trail to Ipsut campground lead to open areas or viewpoints and connect to the trails in the Mowich Lake area of the northwest quadrant of the NP.
The trail to Ipsut campground, now a backcountry camp is five miles from the trailhead at the NP entrance. Above Ipsut campground the trails lead to the Carbon Glacier and the different open and alpine areas in the north and northwest areas of the NP, but many are several day backcountry hikes. This area as does the trails in the Mowich Lake area connect to the Wonderland Trail.
Northwest (Mowich Lake) area.-- The trails to the east and south of the road to and at Mowich Lake go through forests along the road to the lake or at the lake and while those to the south mostly stay in forests along the northwest and west side of the NP, the trails to the east lead to Spray Park southeast of Mowich Lake and eventually Seattle Park east of Mowich Lake.
The trails in both of these areas (Carbon River and Mowich Lake) are interconnected as individual trails or via connections to the Wonderland Trail, and are connected to the trails to the north side to the norheast quadrant and to west side and the southwest quadrant of the NP. This is true for many of the trails in any quadrant or area of the NP, they're almost all interconnected.
Southwest (Nisqually River) Area.-- Most of the trails in this areas also start in the forest, but many provide partial views along the route or lead to or connect to other trails to higher elevations alpine areas or viewpoints, most of which are easily moderate to long day hikes. These include Lake George/Gobbler's Knob, Indian Henry's Hunting Ground, Eagle Peak, and Emerald Ridge.
Paradise Area.-- All the trails in this area either start near, at or above treeline, and offer short distances to expansive views of Mt. Rainier and the NP with some offering extensive views of the Cascade Mountain Range to the east. In addition many trails offer excellent photo opportunies for the best waterfalls in the NP.
Southeast (Ohanapecosh) Area.-- Most of the trails in this area, like the southwest and northwest areas, start in the forest and eventually lead to alpine areas and viewpoints, but most are longer day hikes or backcountry. This area is best for the old-growth forest, geologic features and other photo opportunities.
Northeast (White River) Area.-- The trails in the White River valley offer river and forest scenes in the lower elevations and trails to the open areas and glaciers in the upper elevations, either to peaks on the east side between the White River and the eastern NP boundary along the Casade Divide or to upper elevations and mountains south of the White River and on to the southeast (Ohanaopecosh) area.
Northeast (Sunrise) Area.-- All the trails in the Sunrise area, on the north side above the White River (the continuation of the White River Road past the White River campground), are near or above treeline and offer expansive views and scenes of the north and east side of Mt. Rainier.
There are many vistas and short and day hike trails from the Sunrise visitors area. Many trails extend to the north side of Mt. Rainier to the NP boundary, including Grand Park, and on to the northwest area, and to the upper elevations of the east side of Mt. Rainier and onto the southeast and central (Paradise) areas.
All Areas.-- Some of the trails in all areas lead to the upper elevations open areas, especially the wildflowers in the summer season and to the many glaciers surrounding the mountain. And remember to consider the advisories with your hike.
So the different areas offers tons of photo locations and opportunities with short to moderate, and occasionally long day hikes. And it only takes a few resources and a good map to decide which to hike, explore and photograph Mt. Rainier and the NP.
Advisories
The first advisory is about wildflower meadows and open areas. This applies from spring during snowmelt through the bloom of the wildflowers and seasonal growth of the bushes to the first snows of fall.
Stay on the designated paths and trails in the meadows, especially when snow covered.
You may not leave a trace, but others may not be so cautious and careful about their footprint in environmentally sensitive areas. This is especially important in the late snowmelt season where hiking on the thin snowpack can damage the fragile meadows underneath. In addition you will run the risk of being given a ticket by a Park Ranger for violating the rules (which all visitors accept when entering the NP).
The second advisory is about glaciers. Besides the dangers of being close to glaciers, especially near or below the terminus of a glacier, there is one important point.
When viewing glaciers up close, you should respect the glacier, which are in constant movement and change and creating dangerous situations for anyone close. This is especially true near the terminus (end) of the glacier, where ice is breaking off. An advisory about glaciers.
Do not go on a glacier without experienced hikers or climbers and the proper equipment.
Glaciers are inviting to hike and explore. But they are dangerous for the inexperienced and ill-prepared hikers. Glaciers are very dynamic and constantly changing environments, so it's best to view and photograph them, but don't go on them without guides and equipment.
Another constant problem is the flow below a glacier where the diurnal flow varys as water in the glacier freezes at night and thaws during the day. This causes a cyclical flow in the river below the glacier. This effect extends later in the day going downstream. This is important if you wade across a glacer or snowfed-stream.
Use caution crossing glacier-fed streams and creeks and follow proper crossing technique.
A potential serious problem glaciers are outburst floods. This usually occur in late summer after extended warm periods, but not restricted to these factors. Outburst floods happen when a rapid melting or breaking occurs within the lower end of the glacier causing an extreme amout of glacial ice and material to flow downstream in a wave, such as happened in recent years on Kautz and Tahoma Creeks.
In short, be careful around the terminus of glaciers and in the river channel below glaciers. Be alert to unusual sounds and other signs and move immediately (laterally) up the valley in event of unusual sounds or conditions coming downstream. And always follow the proper crossing technique.
The last advisory is about guns. Beginning February 22, 2010, openly carrying guns in the NP is legal and concealed with a legal permit. However, there are a number of conditions, which you can find here with links to additional information.
It is illegal to carry a gun indoors and it is illegal to use or fire a gun anywhere in the NP.
This is especially important in the visitors areas, the campgrounds, on the trails, and in the backcountry. You can only openly carry a gun or concealed with the proper (state) permit) and nothing else. You can not unholster, use or discharge the weapon anytime or anywhere in the NP. The NPS has trained and instructed the park and backcountry rangers to treat all visitors as if they are carrying a gun unless it is clear the visitor is not carrying a gun.
Personal Notes
There isn't much I can add as personal notes outside of my own experience which isn't much with the wealth of experience of the many other hikers in Mt. Rainier NP. I've done all my hiking and photography in Mt. Rainier NP solo, and can add that it's easy and safe to do if you stay on the trails.
I would only go off-trail in the forest if you have the off-trail navigation skills and experience. In the higher elevation alpine areas, use caution to stay in the areas allowed, and only travel on glaciers with experienced hikers and the proper equipment.
Resources
Currently there are three excellent books, nos. 1-3 below, and two pamphlets, no. 4, for day hikes in Mt. Rainier NP. Please note the advisory about these book if you find or buy one published before 2009.
Note the change about the Carbon River (Northwest Quadrant) entrance after the closure of the Carbon River Road at the NP boundary since the winter of 2008. The extra distance of 5 miles from the entrance to the Ipsut Creek campground is not included in some of the descriptions in these books.
This does limit the number of day hikes from this entrance to the moderate or harder, some hikes requiring a backcountry permit for overnight camping to get to the trailhead.
- -- Day HIkes Mount Rainier by Heidi Schneider and Mary Skjelset, Falcon Press
- -- Day Hike Mount Rainier by Ron Judd, Sasquatch Books
- -- Day Hiking Mount Rainier by Don Nelson, Mountaineers Books
- -- 12 Short Hikes Mt Rainier NP, Sunrise and Paradise volumes by Jeffrey Smoot, Falcon Press
In addition to hiking guides, you will need to remember two things. The first is having a good daypack with the ten essentials along with other things you want to take with you. The second is simple, a map. And you can find sources for maps and download DRG files of USGS topo maps.
Please use the contact link to send e-mail.