
Mt Rainier National Park Photo Tips
MPG V2.8, January 2013
Introduction
Due to the variety of photography equipment and the diversity of interests in photographers, it is difficult to present good photography and equipment tips when you comes to Mt. Rainier National Park, but I can give some general guidelines on equipment from my experience and my knowledge researching other photographers working in the National Park. Some photography field tips are given in the area Web pages in addition to hiking tips. If you're not familar with photographing a landscape like Mt. Rainier, I would recommend National Geographic Society Photography Field Guide.
Photography
To begin with I'll focus on 35mm fullf-frame or film camera systems, and those with other size digital, medium format, and large format cameras can make adjustments for the focal lengths for their lens systems. In addition, zoom lenses can make your photography in the Park easier, especially if you have close focusing or macro lens(es). I focus on my photography using fixed focal length lenses, commonly termed "prime" lenses, which are described here.
Lenses
As a general practice you'll get a wide range of photographs using a set of lenses, or comparable zoom lenses, namely, a wide angle lens, 28mm to 40mm range, a normal lens, 45mm to 60mm, a short telephoto lens, 85mm to 135mm, and a macro or close focusing lens. Generally there is very little need for a lens longer than about 135mm because of the forest environment in most of the Park and the summit being so close above timberline.
A 200 to 300mm lens is handy, with a 1.4x or 2x teleconverter, for wildlife photographs, at viewpoints for distant glaciers and other features, or on the way to or from the Park. A lens shorter than about 28mm isn't usually useful unless you're interested in extreme wide angle images, but if you are, the photo ops are there for these lenses.
Photographic Opportunities
A camera with fill flash or a small external flash helps in situations where you want fill-in light for photograph of friends or family, of flowers in shady areas, or on overcast days. You will need a good tripod and head. Depending upon your camera system, you can use the full range of tripods, from small portable one to high-end ones. My preference is for GitzocCarbonfFiber tripods. A good ballhead provides good flexibility for most situations in the field.
Filters
The use of filters is optional for some photographers and mandatory for some photographers. It just depends on your interest, your equipment, your medium (film or digital), and your end product(s) (print, Web, publication, etc.). This is due to the fact that many digital cameras aren't sensitive to the range of light similar to film and have built-in color and black and white filters, and many post-processing photo or image editors and applications have built-in or plugin filter tools with their editing tools.
Color Filters
In most situations you can get good results using a film or digital setting in the ISO 50-100 range for sunny conditions and ISO 200-400 for shade or forest conditions. Film preference varies with your interest from color balanced film, such as Kodak's Elite Chrome and Fuji Provia, to saturated films, such as Fuji Velvia. You should be familar with films or your digital settings before you come to get the best results.
Personal Use of Filters
That said I use filters in many cases, in part because I still shoot film and some filters have general use with any medium. These include ultraviolet (UV) or sky filters, polarizer filters and neutral density filters. The UV, or sky, fileters are often used as lens protection (a damaged $50-100 is cheaper than a $500-2,000 lens) and useful for higher elevations light with film, but unnecessary with digital). Polarizer and neutral density filters are useful for many landscape and nature scenes.
Black & White
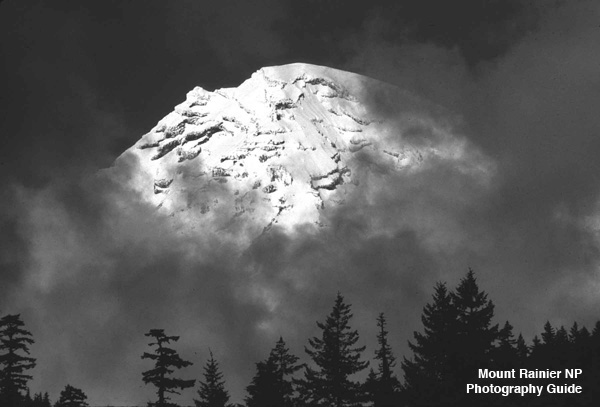
You can get excellent black and white photographs using the full range of black and white film in the ISO 25-200 range or using the monochrome settings on your digital camera. While there are many photo editors with great tools and applications for converting color to black and white images, I've found it's often easier to capture the photo or image in black and white while you're standing there than all the work later in the computer.
Personal Use with B&W
I won't argue the computer side of the conversion has far more capabilities and control, especially using the original 12-bit color image from the camera over the 8-bit black and white in the camera, but the truth is that you would be hard pressed to tell the difference in the final prints. Besides working in black and white in the field takes a different photography perspective one should learn and practice.
Resources
Before you plan your photo locations in Mt. Rainier NP, there are a number of excellent photography books along with photographers' Web sites in photography guide Web page on Mt. Rainier NP to get ideas of places and photographs. Most good bookstores should have these.
- "Washington's Mount Rainier National Park", Pat O'Hara and Tim McNulty
- "Mount Rainier National Park, Realm of the Sleeping Giant", O'Hara and McNulty
- "Mount Rainier", Don Geyer
- "Mount Rainier National Park Impressions", Charles Gurche
- "Mount Rainier, Views and Adventures", James Martin and John Harlin III
Please use the contact link to send e-mail.